
Best Donut Recipe Ever!

I did a little test baking this past weekend and made the Best Donut Recipe Ever! I modified an old recipe that I had and hope you enjoy this as much as my family did.
This donut recipe is fantastic because it’s light and fluffy and the donuts melt in your mouth.
When I was growing up, my family didn’t have much money. So sweets weren’t always on the grocery list. Although my Mom is a great cook, she wasn’t much of a baker (please don’t tell her I told you). There were a few things she used to make us like her bread pudding recipe which I still make to this day. Other than that, she usually bought store bought cakes like Pepperidge Farms. Hey, they weren’t homemade, but those cakes were really delish!
My infatuation with baking started when I was 8 years old after watching Willy Wonka stroll through the pathways of sweets in Charlie and the Chocolate Factory. It’s still one of my all time favorite childhood movies that I can still watch and enjoy. One of the very first things I ever made was donuts. Although I loved experimenting with recipes. Admittedly, not everything I used to make came out as good as I’d hoped. In fact, I made some absolute messes and baked a few things that made it straight to the trash can.
While in culinary school, I really learned so much about how ingredients interact with each other. Of all the cooking methods, baking is my favorite and it’s is truly a science. You can’t just mix flour, baking powder and other ingredients in random measurements and expect your baked goods to be worthy of eating. I mean you can, but you’re result may not turn out the way you hope.
Most Common Types of Donuts
The most common types of donuts that can be found in most donut shops are:
- Yeast Raised Donuts
- Cake Donuts
- French Cruller
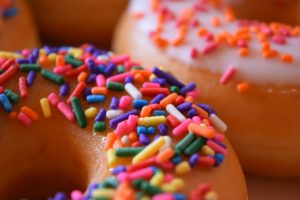
This is just the beginning! The fun starts when the toppings start going on. One of my favorite local gourmet donut shops has a Fruity Pebbles donut that is to die for! That’s just the tip of the iceberg because donuts can be filled and topped with just about anything.
This recipe is a yeast raised donut recipe. It requires yeast for leavening which gives it that light pillow like texture.
Fresh yeast is not always easy to find in local markets because it has a very limited shelf life. Most grocery stores carry dry active yeast (which has to be re-hydrated) or instant yeast (can be combined directly into a recipe without the need to re-hydrated).
A great resource for understanding everything about yeast is King Arthur Flour. You’ll be able to find out everything you need to know about different types and uses of yeast and flour, as well as a plethora of recipes.
YEAST CONVERSION TABLE
I had to convert my original recipe that called for fresh yeast to instant yeast which is what I had in my pantry. See the chart below for instruction on how to convert yeast from one form to another:
Fresh Yeast to Dry Active Yeast: Multiply quantity of fresh yeast by 0.4
Fresh Yeast to Instant Yeast: Multiply quantity of fresh by .33
Dry Active Yeast to Fresh Yeast: Divide quantity of Dry by 0.4
Instant Yeast to Fresh Yeast: Divide quantity of instant by .33
Some of the ingredients I use in this donut recipe are commercial type ingredients. What I mean to say is they may not always be found in your local grocery store. Don’t worry though, I’ll give you the link for the ingredients as well as options for substituting some of the ingredients.
If you notice in the recipe below, I use high ratio shortening. You can get this at specialty bakery shops and online in smaller quantities. Commercially, it’s sold in 50 lb. containers. That’s way more than you’ll need for this recipe. High ratio shortening is fantastic for other recipes such as cakes, icing and cookies. It doesn’t have that greasy mouth feel you get with regular vegetable shortening and it’s emulsified which means your baked goods will have a better texture.
Tips: It’s best to have a thermometer that you can place in the oil during frying. The oil can over heat quickly which will prevent you from getting an even golden color on both sides of the donuts. Having a thermometer will ensure the oil stays at a constant temperature of 375 degrees.
I recommend a candy thermometer which you can clip on the side of your pot such as the one below:
Best Donut Recipe Ever
Equipment
- Stand Mixer
Ingredients
- 2 Whole eggs room temperature
- 12 oz Warm water
- 4 oz Heavy cream
- 1 tsp. Vanilla bean paste
- 28 oz King Arthur bread flour
- 4 oz Granulated sugar
- 1/2 tsp Salt
- .66 oz Instant yeast
- 1/2 tsp Mace
- 3 oz High-ratio shortening
Instructions
- Pour water and heavy cream into a glass measuring cup and heat in the microwave for 15 seconds just to warm it. Do not make this too hot, just warm to the touch.
- Add warmed water to bowl of a stand mixer and add in vanilla bean paste.
- Measure all dry ingredients into a bowl and give it a quick stir with a whisk to aerate the flour mixture.
- Gently pour all dry ingredients into the bowl of your stand mixer.
- Place the dough hook onto your mixer and mix on low speed until the ingredients are slightly incorporated.
- Stop the mixer and add in the Hi-Ratio shortening.
- Turn the mixer back on and continue mixing on medium/low speed for 5 minutes.
- If the dough looks wet or too sticky, add in a scant handful of flour to the dough until it begins to come away from the bowl walls, yet stays stuck to the dough hook.
- Dust your rolling surface with a little flour and scrape out the dough onto your surface.
- Gently kneed the dough for a few passes.
- Clean out your mixing bowl and wipe it down with a little oil or it can be sprayed with cooking oil. This is just a small enough amount to keep the dough moist.
- Turn the dough ball in the oil to coat all sides and cover your bowl with plastic wrap and a kitchen towel.
- Walk away from your mixing bowl and let the yeast do it's magic! Through the science of baking, your dough is going to double in size. Are you excited!!
- Once the dough is doubled in size, take off the towel and plastic wrap. It may start to deflate on it's own or you can gently work out some of the air.
- You are now ready to start rolling out your dough and cutting it into the shapes you want.
- Dust your surface lightly with flour and roll the dough to 1/4-1/2" thickness. Using a cutter, create the shape donuts you want.
- Allow your donuts to rise in a draft-free place such as your oven until they are about 3/4".
- Heat oil in a fryer to 375 degrees. Place a few donuts in the hot oil and cook until beautiful golden color. Flip the donuts and cook on the other side.
- When donuts are done, remove from oil and place them onto paper towels. Allow the paper towels to soak up any excess oil while they cool.
- Dip donuts in glaze and/or the topping of your choice.
Donut Glaze
- Making a glaze is super easy. Mix 1 cup of powdered sugar and add a tablespoon of milk or water at a time just until the glaze comes off the spoon in a steady stream. You can add flavors to the glaze as well such as vanilla, lemon or whatever you like.
Leave A Comment